Relation Mapping
Relation Mapping
OverviewData sources (systems/subsystems/projects/entities) can be related to other data sources within the same datamap. For example, the system Workday can be a parent system to Accounts Payable. These relations can be determined by you based on the way that the different data sources work with each other in your organization.
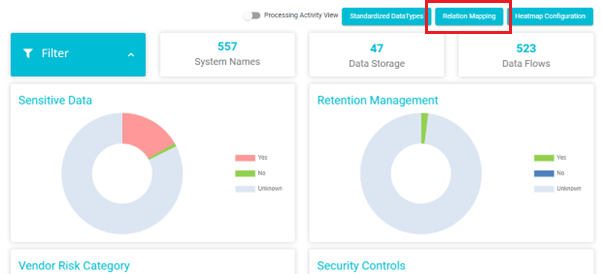
To create new Datamap Relations, follow these steps:Click on Relation Mapping from the Datamap dashboard
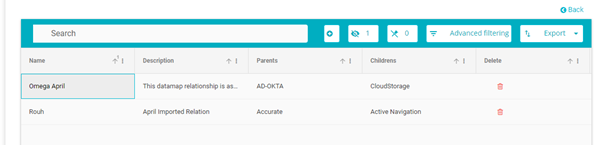
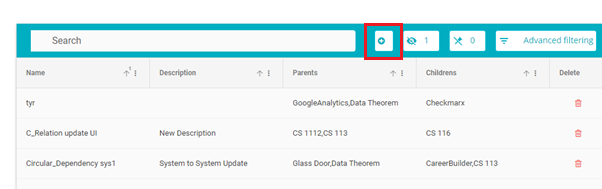
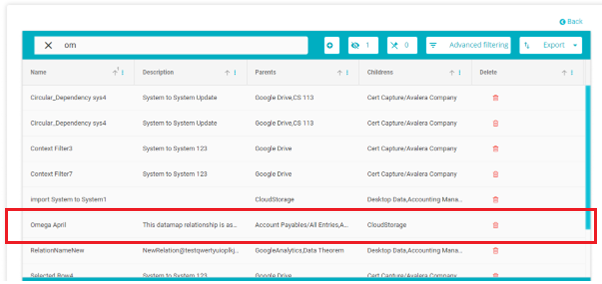
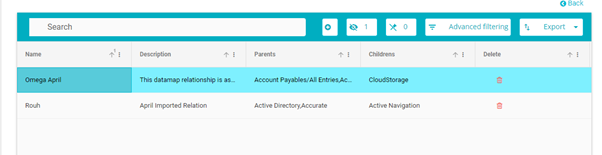
The grid of existing datamap relations will open
Here you can see existing relations, and the systems associated with them
To create a new relation, click on the Add Button
The Relation Mapping box will appear
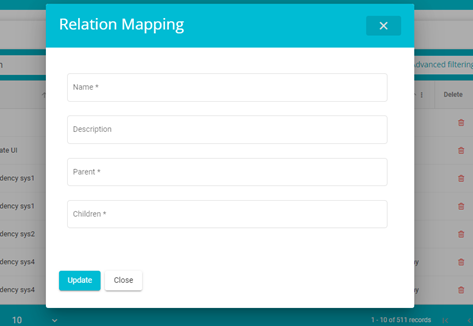
Here, you can add the following details
- Name: Type in the name of the relation here. This is a mandatory field
- Description: Add a description for the relation here. This is not a mandatory field
- Parent: From the drop-down menu, select the data sources that would become the parent data sources in this relationship. Multiple selections can be made here. This is a mandatory field.
- Children: From the drop-down menu, select the data sources that would become the children data sources in this relationship. Multiple selections can be made here. This is a mandatory field.
In the below example, 3 systems have been selected as parent systems and one system has been selected as the child system
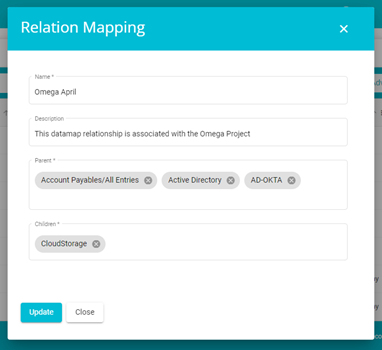
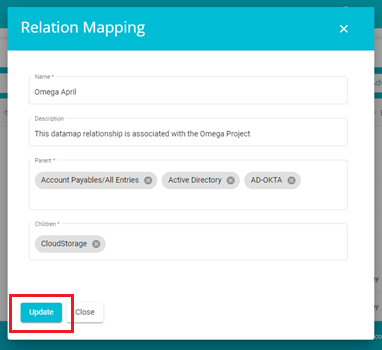
Once the required values have been added, click on the Update button
The new relation will be added to the Relation Mapping grid
Click on the Name of any existing relation to make edits to it. Once the edits have been made, click on the Update button once again.
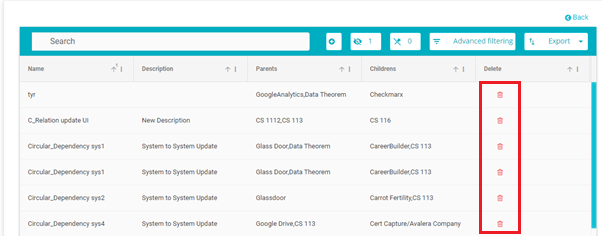
To delete any relation, click on the delete button corresponding to that relation
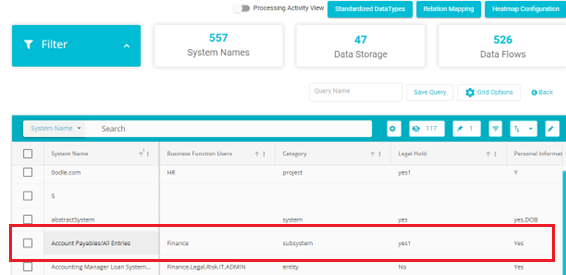
Once relations have been created, they can be viewed on the System Details page of the Datamap. To view the relations, follow these steps
Click on the system/subsystem/project/entity associated with a datamap relation
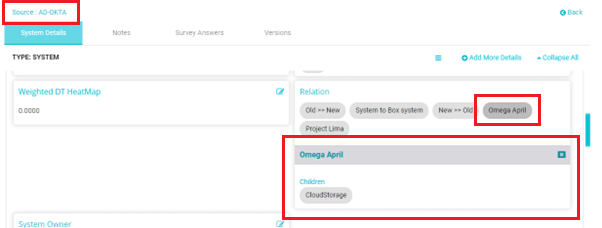
Once on the System Details page, scroll down to find the Relation field
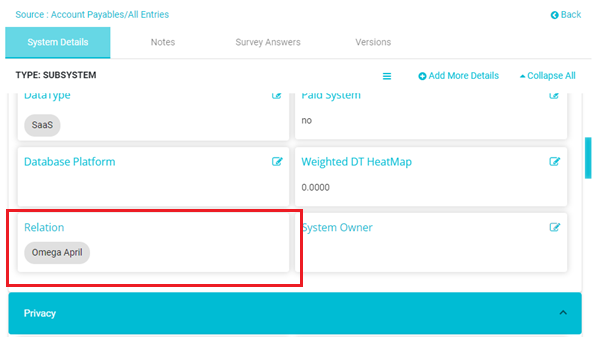
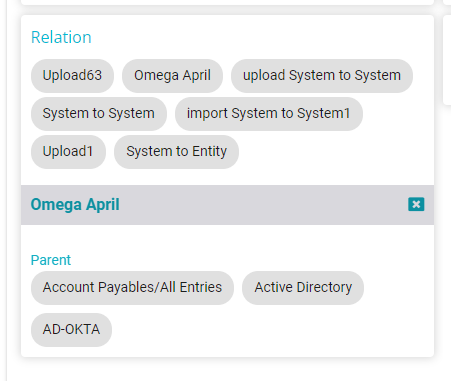
Here you can find any associated relations
Click on the relation you want to view
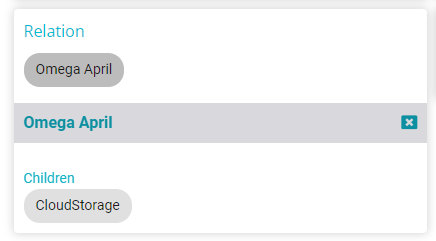
Here you can see the systems associated with the selected relation. In this case, CloudStorage is the child system to the parent system Account Payables. If you click on CloudStorage, you will be redirected to the System Details page for CloudStorage On the Cloudstorage System Details page you can see all the relations associated with Cloudstorage
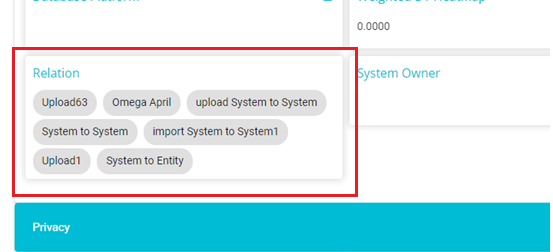
Click on any relation to see the systems associated to that relation
Note: There is no limit on how many relations a system/subsystem/project/entity can be a part of. There is no limit on the role a system/subsystem/project/entity plays in a relationship, i.e., any data source can be a parent and any data source can be a child.
- If a data source is a parent to one system in one relation, it can be a child to another in another relation.
- If a data source is a parent to one system in one relation it can be a parent to another in another relation.
- If a data source is a child to a system in one relation, it can be the parent to the same system in another relation.
Importing Relations
OverviewMany DataMaps contain numerous systems/subsystems/projects/entities making it a tedious task to define relations individually. In such cases, multiple relations between different systems/subsystems/projects/entities can be defined together and imported to the DataMap, saving you time.
Generally, to import data into our tool, a similar structure is followed.
Configure the excel template (Configure the columns you want included in the excel sheet onto which you will be adding the data you wish to import onto the tool)
Download the excel template onto your device
Open the template on excel on your device
Fill in the required data
Upload the filled in sheet back onto the tool
Click on Upload on the hamburger menu

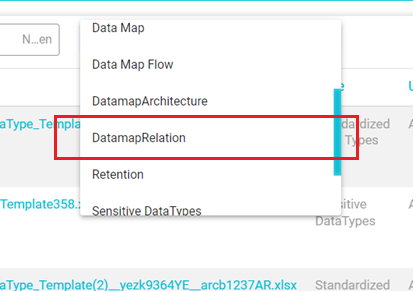
Once on the Upload page, click on the Select Document Types drop down menu
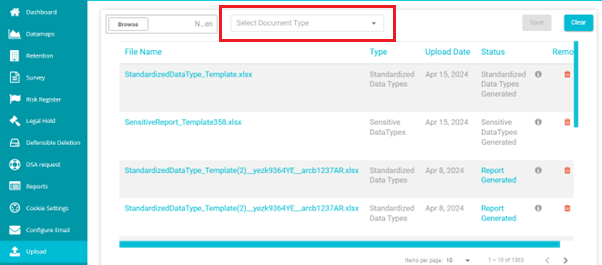
From the drop-down menu, click on DataMap Relation
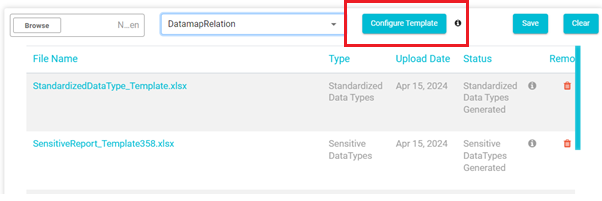
Once DataMap Relation has been selected, click on the Configure Template button
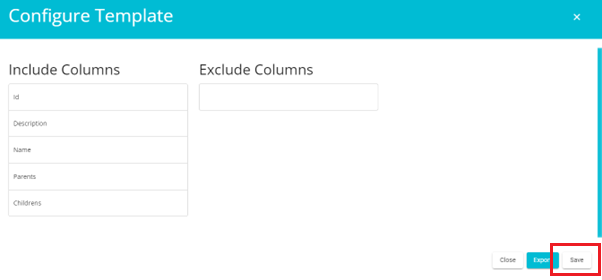
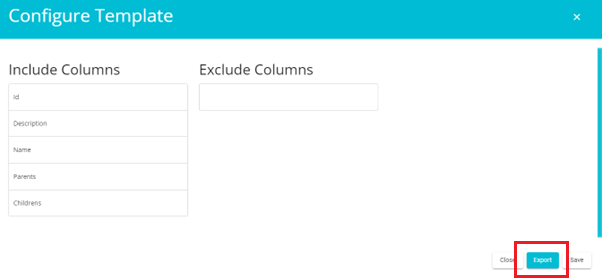
On the template configuration page, you can select the column you want to include in your excel sheet
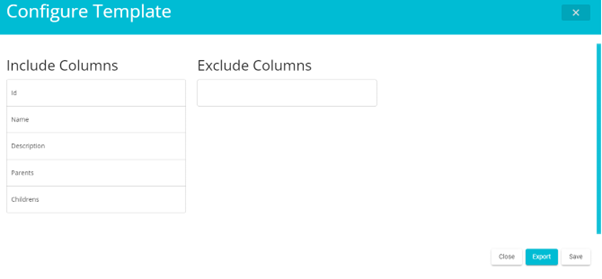
To exclude a column, drag and drop it in the Exclude Column section
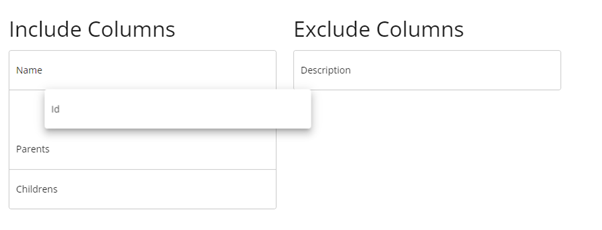
Note: Name, Parents and Children are mandatory columns, they cannot be excluded
Once the template is configured, click on the Save button. On clicking the Save button, you can exit the template configuration page and come back to it to find the same configuration saved
Alternatively, you can click on the Export button to download the template to your device
Open the template with Excel
On the excel sheet, fill in the columns with the required data.

*Note: The Name, Parent and Children fields are mandatory. Ensure to fill in the Parent and Children fields with the correct names of the Datamap systems/subsystems/projects/entities

Use commas to separate values on the sheet Ensure there are no spaces between the comma separated values

Save the sheet onto your device
Once the sheet has been updated with the required data, go to the Upload page on the tool
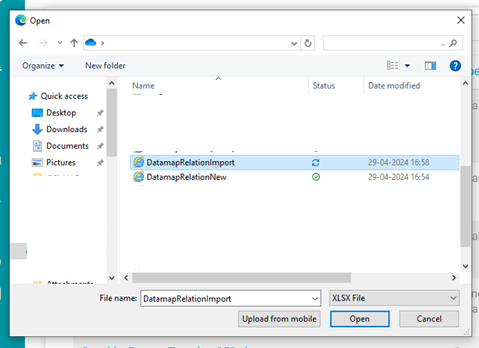
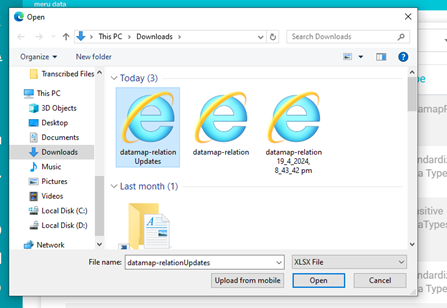
Click on the Browse button
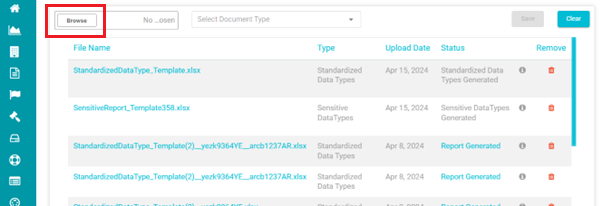
Select the saved sheet from your device *Note: Ensure the file name does not have any spaces in it
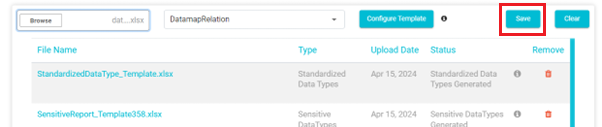
Select Datamap Relation from the Select Document Type drop-down menu

Click on the Save button
The following message will appear on your screen

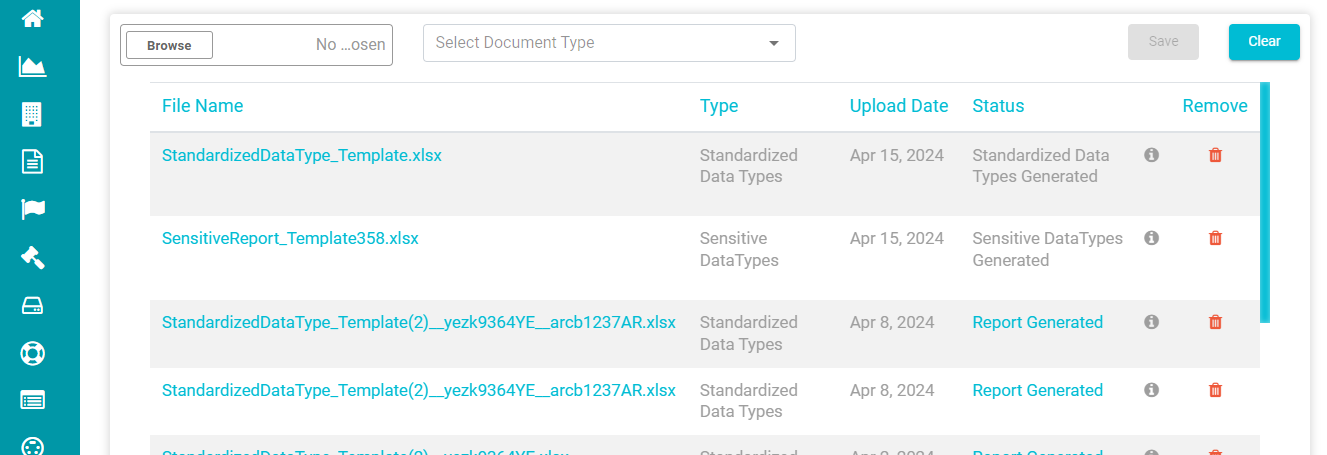
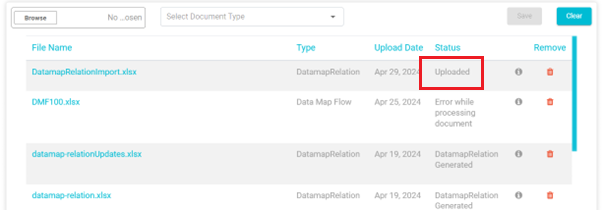
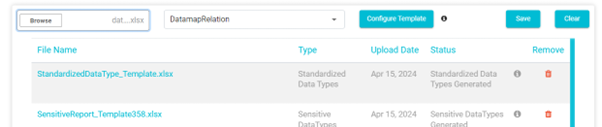
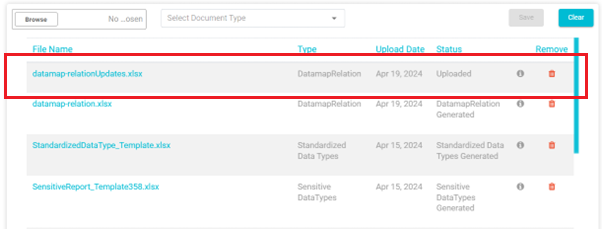
The file will appear on the grid of existing uploads

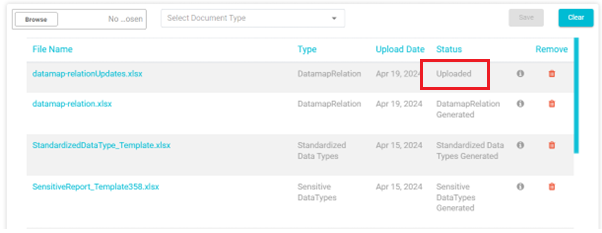
The file will get uploaded to the Data Governance Tool. The status of the file at this time will be Uploaded.
A web job runs every 5 minutes, which will change the status of the uploaded file. Refresh the page to view the new status.
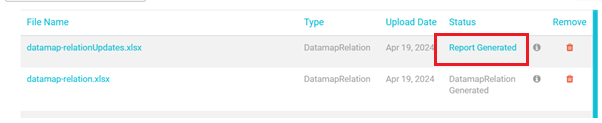
After the web jobs runs, the status of the file will change to Report Generated.
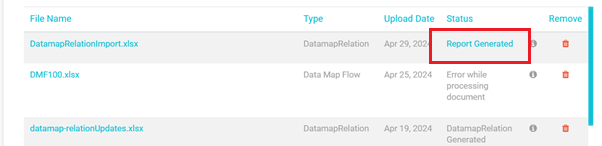
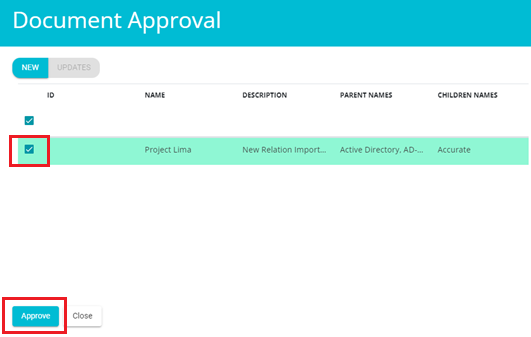
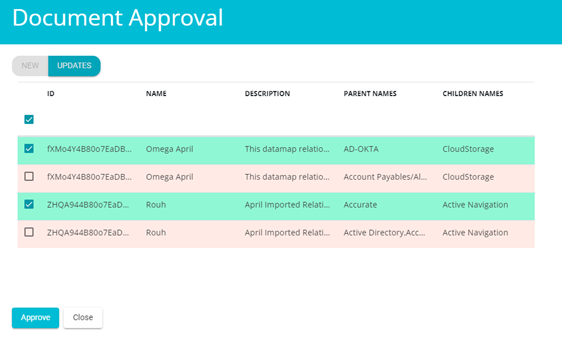
Click on Report Generated to view the file and verify that the details are as required. Here the details of the relation/s to be updated to the Datamap will be displayed. If there are any details that you don't want updated to the Datamap, uncheck the box corresponding to that row. For example, if you are adding three new relations via uploads and while approving the upload you realise that one of the relations has incorrect details, you can uncheck the box corresponding to that relation. The remaining relations will be uploaded excluding the unchecked relation. Once the verification is done, click the Approve button present on the bottom left of the screen.
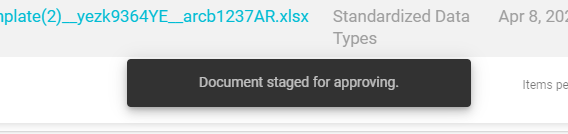
On clicking Approve, the following message will appear
The status of the file will change to - To be Approved

Once the web job runs, the status of the file will change to Datamap Relation Generated

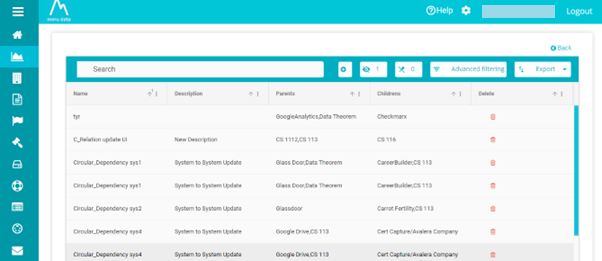
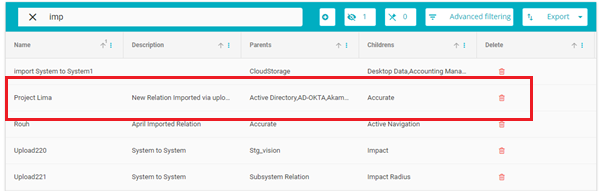
The new relation can now be seen on the Relation Mapping page
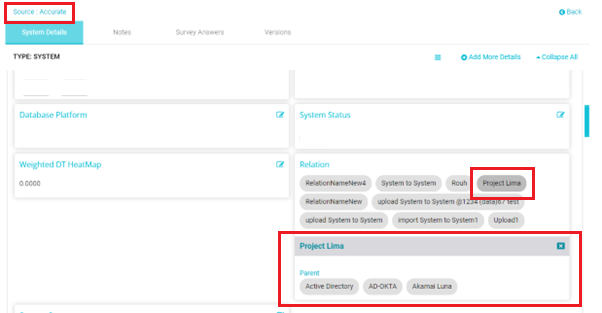
The relation can also be seen on the System Details page of the associated systems/subsystems/projects/entities
To update existing relations, follow these steps:
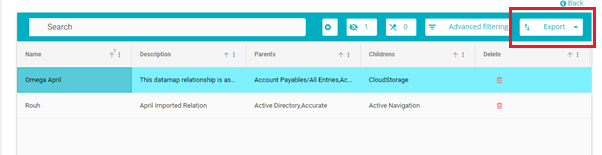
On the Relations Mapping page, filter the grid to display those relations you want to update
Once the grid has been filtered according to your requirements, Click on the Export button
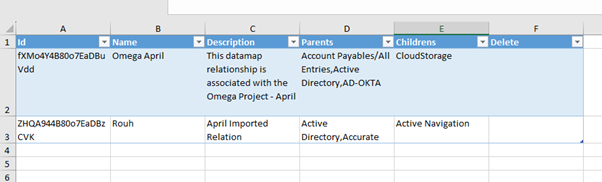
Click on the Export to Excel or Export to CSV option depending on your requirements. For this example we have selected Export to Excel

On clicking your selection, the file will download to your device. Open this file with excel on your device
Make the required updates to the file
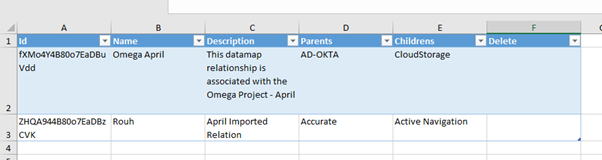
Once the changes have been made, save the file to your device
Now, upload the saved file back onto the tool
Go to the Upload page on the tool
Click on the Browse button
Select the saved sheet from your device Note: Ensure the file name does not have any spaces in it
Select Datamap Relation from the Select Document Type drop-down menu
Click on the Save button
The file will appear on the grid of existing uploads
The file will get uploaded to the Data Governance Tool. The status of the file at this time will be Uploaded.
A web job runs every 5 minutes, which will change the status of the uploaded file. Refresh the page to view the new status
After the web jobs runs, the status of the file will change to Report Generated.
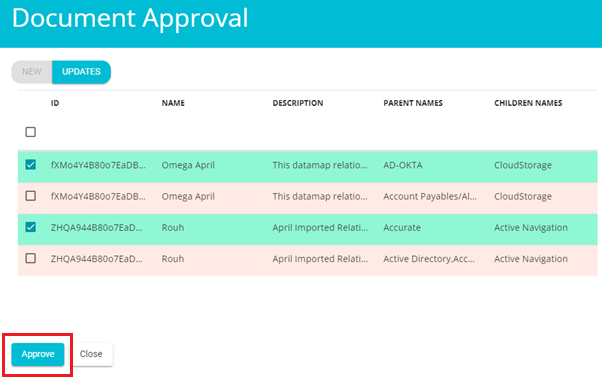
Click on Report Generated to view the file and verify that the details are as required.
The rows highlighted in blue show the updates, while the rows that are not highlighted show the data without the updates
Here, in case you do not want to go ahead with the new updates, you can uncheck the highlighted row and check the non-highlighted row. On doing so, the new updates will not made

Once the verification is done, click the Approve button present on the bottom left of the screen.
On clicking Approve, the following message will appear
The status of the file will change to - To be Approved

Once the web job runs, the status of the file will change to Datamap Relation Generated

The new changes will now be reflected on the Relation Mapping grid as well as the System Details page of the associated systems/subsystems/projects/entities